The Alderney Farmers Market this weekend went so great! I brought 5 items along with me to introduce Oliver Treasures and to gain interest, and I sold one! I didn’t expect to sell anything, because lets face it, most people who go to a market don’t usually plan on spending $100+ on furniture. I ended up selling my Mexican inspired blue coffee table, which was the first piece of furniture I flipped after starting this. Besides that, I gave out a ton of business cards and talked to a lot of people who stopped to check out my booth! I got so much positive feed back from customers and other market vendors (everyone there is so nice!). Of course I forgot my camera (Ugh!), so I don’t have any pictures to share, but I’ll definitely be taking some this weekend!

Monday, 16 July 2012
Thursday, 12 July 2012
Alderny Farmers Market!
 It's official! This saturday I'll be at the Alderny Farmers Market! Located right downtown Dartmouth, this market is a perfect way to get people interested and aware of my little furniture business : ) I plan on having about 6-7 pieces of furniture for sale, but really I'm just trying to get my name out there, I don't imagine I'll sell much this weekend but thats ok!
I feel like I have so much to do now: I have the bench to finish, tags to make, sun catchers to put together, not to mention I have to get everything down to the market! Thank god for Mom's truck haha. I'll post pictures of the market on Sunday!
Tuesday, 10 July 2012
Meet Jack!
I'm back from Quebec and WOW, what a trip! It was so much fun but I'm really happy to be home and working on furniture again, plus I have so much catching up to do! My furniture is going to be featured at the Alderny Farmers Market this weekend which I'm so excited about, but I feel like I'm not ready. I found out that instead of being inside at the market, Ive been given a small barn where I can decorate it however I want and use to display all my things. I don't really expect to sell a lot this week, it's more of a way to show people what I can do. I have today off work, so I'm going to be working all day on getting ready for the market!
Here's a table i have recently finished. This is the before picture.

And here's the after!


Here's a table i have recently finished. This is the before picture.

And here's the after!


Wednesday, 27 June 2012
What a mess!


This is what I'm dealing with right now. I've started to sand off the sticky mess, but its taking forever!

My original plan was to stain the top and paint the bottom. I'm trying to decide if I should risk staining, on the count of the wood filler may be too obvious, or just paint the whole thing... This project is definitely going to take a lot of elbow grease and patience, I'll post pictures when I'm done!
Sunday, 24 June 2012
A well travelled dresser
I'm so excited how this dresser turned out! I picked this up off the side of the road a couple weeks ago and it had no knobs and looked as if someone had previously attempted to sand it down. The top was half sanded and was a mess. Once again, I really wish i had of taken a before picture : (
 The first thing I did was sand down the faces of the 3 drawers. I knew I wanted to make these look like old crates that had postage stamps and other designs on them. I found the design for the middle drawer on a great site called The Graphics Fairy. After transferring the designs on the bare wood, i went over them with a sharpie marker and sanded them a little to make them look aged. I'll add a link to my DIY projects page for complete instructions. I chose to use Minwax Polyshades in the Natural Pine (looks just like an old crate!) and finished the drawers off with some great handles.

For the body of the dresser I used Burled Redwood from PPG and mixed it to make my own chalk paint. This turned out to be the PERFECT colour! It's nice and rich, warm, and looks like it has a history. After distressing it with 150 grit sand paper, I sealed it with Minwax Paste Wax.
I couldn't be happier how this turned out! I'm definitely going to try this look on another piece soon : )


For the body of the dresser I used Burled Redwood from PPG and mixed it to make my own chalk paint. This turned out to be the PERFECT colour! It's nice and rich, warm, and looks like it has a history. After distressing it with 150 grit sand paper, I sealed it with Minwax Paste Wax.

Thursday, 21 June 2012
A new addition!
I'm just about finished my latest project. This is one of my awesome finds during the curbside giveaway, which means it was free! I already had the paint, so with only spending about $10 for stain and a new brush, it's totally changed. That's definitely my favorite part about furniture flipping, the end result! You can find the Before picture of this desk Here.

After sanding down the top, I used Minwax Polyshades in Antique Walnut. This product is great because it has both the stain and polyurethane in one. Two coats of that was all it needed. Then I mixed up some homemade chalk paint in a nice yellow and green for the body, and then used the dark paste wax for antiquing.
Right now I'm trying to get into the Alderny Farmers Market, I have a meeting next week with the lady in charge of deciding who can be a vender. Hopefully she like my stuff so I can get a tent to display my furniture! *fingers crossed*


Right now I'm trying to get into the Alderny Farmers Market, I have a meeting next week with the lady in charge of deciding who can be a vender. Hopefully she like my stuff so I can get a tent to display my furniture! *fingers crossed*


Wednesday, 20 June 2012
New life to old shutters
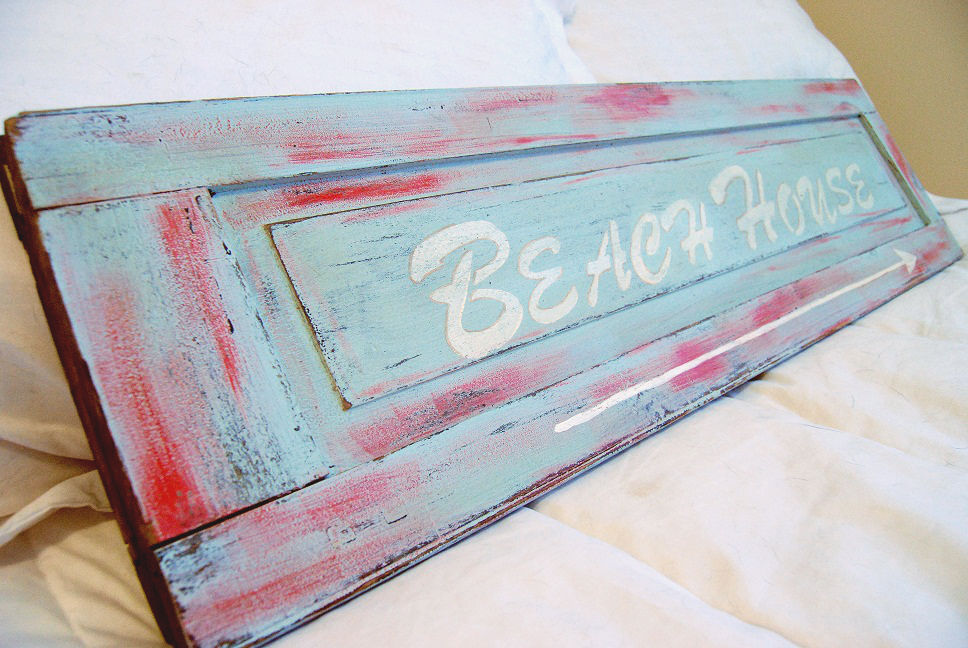
Detail:

Subscribe to:
Posts (Atom)